10 Essential Tips for Installing Underground Conduit Effectively?
Installing underground conduit is a crucial task in electrical and utility work. Proper installation enhances safety and efficiency. The National Electrical Contractors Association (NECA) reports that up to 30% of electrical failures are due to improper installation methods. Using underground conduits can improve system reliability significantly.
However, the process of installing underground conduit comes with challenges. Soil conditions, water tables, and environmental factors all play a role. According to a study by the International Electrotechnical Commission, improper conduit placement can lead to costly repairs. Many installers overlook these factors, leading to potential failures down the line.
Effective installation of underground conduit requires not only precision but also attention to detail. Common mistakes often arise from inadequate planning. A well-thought-out approach can minimize issues and ensure compliance with industry standards. Learn to avoid pitfalls to achieve optimal results.
Understanding the Purpose and Benefits of Underground Conduit Installation
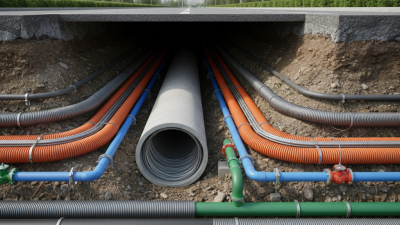
Underground conduit installation serves as a protective pathway for electrical wiring and communication lines. This setup prevents damage from environmental factors and physical interference. It also minimizes the risk of accidental contacts, enhancing safety. By ensuring your cables are shielded, you can reduce maintenance costs in the long run.
Tips for effective installation focus on planning and precision. Before starting, mark out your desired route clearly. Avoid areas with heavy foot traffic or potential excavation risks. Digging a trench requires a careful assessment of soil conditions. Use a level to ensure a smooth, even placement of the conduit. This step can significantly impact the longevity of the installation.
Consider using a proper backfill material. It helps protect the conduit while allowing for drainage. Keeping the conduit at a correct depth is important too. Remember to check local codes and regulations for depth requirements. Each area may have different standards, so do your research. It’s a simple step that can save you headaches later. Making these considerations will lead to a successful and effective installation.
Choosing the Right Materials for Durable and Effective Underground Conduit
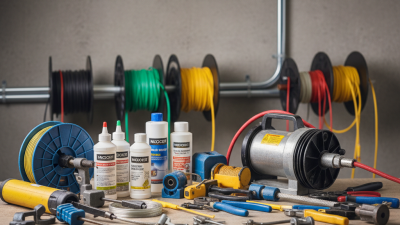
When installing underground conduit, choosing the right materials is crucial for longevity and performance. Polyvinyl chloride (PVC) conduits are popular due to their lightweight nature and resistance to corrosion. However, they may not be ideal for all situations. For areas with frequent temperature fluctuations, consider using metal conduits, which offer additional protection but can be heavy and challenging to work with.
Select conduits that can withstand the environment. If your area has moisture issues, ensure your current materials are waterproof. Underground conduits often face physical stress, so durability matters. Some contractors underestimate the importance of proper fittings and seals, leading to leaks and breakdown over time. Regularly inspect connections to avoid issues.
Also, consider the installation process itself. It can be easy to overlook the depth and spacing of conduits. Insufficient depth may expose them to damage. Always plan for soil conditions and potential obstacles. Improper planning can lead to complications later. Take the time now to reflect on potential pitfalls, ensuring a successful installation to prevent future headaches.
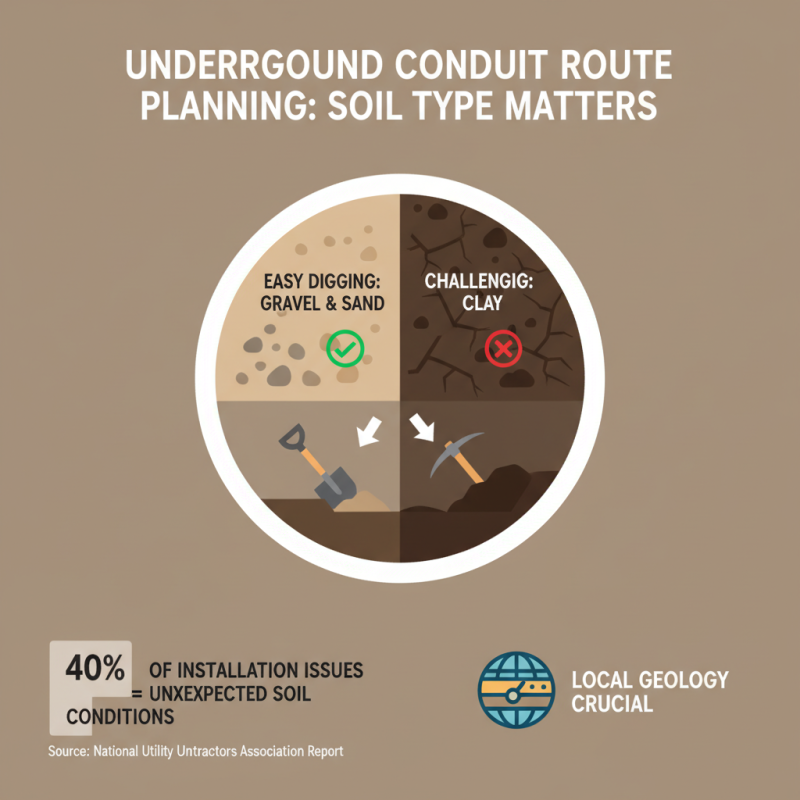
Planning the Installation Route: Factors and Best Practices to Consider
When planning the installation route for underground conduit, several factors deserve careful consideration. One of the primary factors is soil type. According to a report by the National Utility Contractors Association, about 40% of installation issues arise from unexpected soil conditions. Gravel and sand can allow for easy digging, while clay poses significant challenges. Understanding the local geology is crucial for efficient routing.
Another important aspect is existing infrastructure. Always map out utility locations before starting. The Common Ground Alliance states that 35% of utility damage cases occur because contractors failed to check for existing lines. Stakeholders should invest in locators to avoid costly damages. Additionally, it’s wise to maintain a safe distance from other utilities, typically at least 18 inches, to prevent interference and ensure safety.
Lastly, choosing the right depth is a common oversight. The National Electrical Code recommends a minimum of 24 inches for many installations. Yet, some projects fall short due to poor planning. Proper depth helps to protect the conduit from environmental factors and mechanical damage. Reflecting on these elements can lead to a smoother installation process and reduced long-term costs.
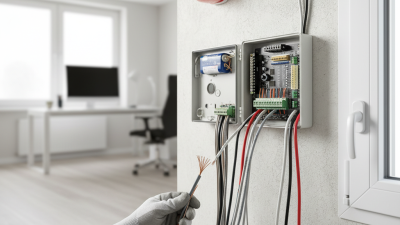
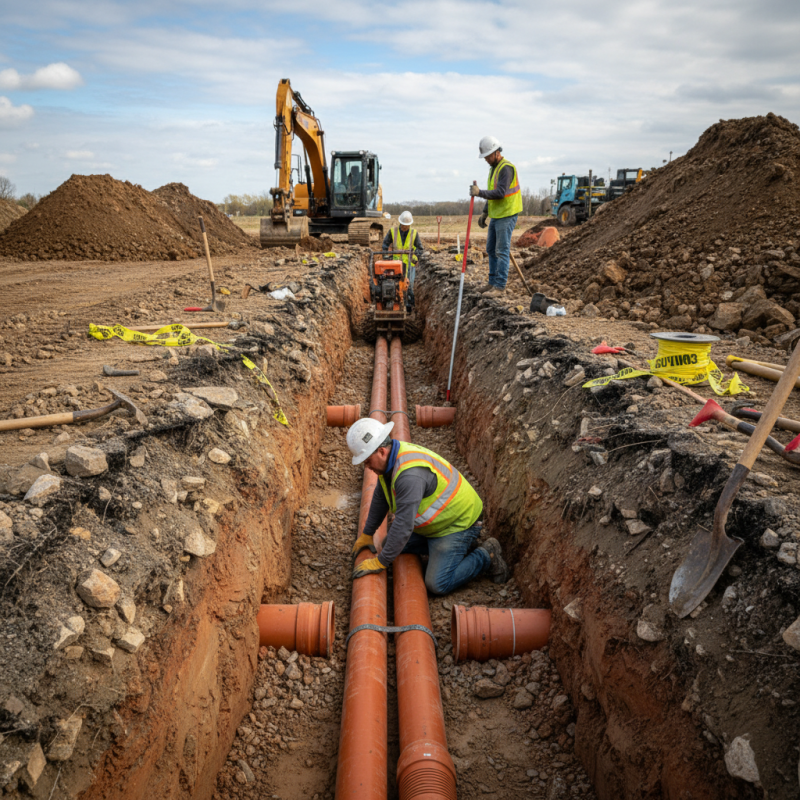
Step-by-Step Guide to Properly Digging and Preparing the Conduit Trench
Installing underground conduit requires careful planning and execution. The trench is crucial for effective installation. According to the National Electrical Contractors Association (NECA), up to 30% of installation costs come from improper trenching techniques. A poorly dug trench can lead to future repairs and downtime, impacting your project's overall timeline and budget.
To begin, ensure you have the right tools and materials. Digging a trench typically requires a shovel, a pick, and possibly a backhoe for larger installations. The depth of the trench should comply with local codes, often about 18 inches for residential wiring. Make the trench wide enough to accommodate the conduit and allow for proper backfilling later. Remember, if the trench isn't deep enough, you might run into issues with frost heave or water intrusion. Inadequate depth can weaken the infrastructure over time.
When digging, watch for underground utilities. Hitting lines can cause costly delays. The Common Ground Alliance estimates that about 1 in 5 residential dig-ins hit underground utilities. This not only creates safety hazards but also increases project costs significantly. Once the trench is properly dug, ensure it’s free of rocks or debris. Proper preparation here prevents future issues, allowing for a secure and long-lasting installation.
10 Essential Tips for Installing Underground Conduit Effectively
Best Practices for Securing and Covering Underground Conduit for Longevity
When installing underground conduit, securing and covering it properly is crucial. Choose high-quality materials to ensure longevity. The conduit should be buried deep enough to avoid accidental damage. Aim for at least 18 inches of cover in normal soil conditions. This depth helps protect the conduit from impact and weather extremes. Consider the location as well. Areas with heavy traffic may require additional precautions.
Using the right covering method is vital. Backfill with caution. Avoid sharp rocks that could compromise the conduit. Regularly inspecting the site after installation is a good practice. Look for signs of settling or erosion. Over time, soil movement can expose buried conduit. This can lead to damage or failure.
In some cases, people forget to mark the conduit’s location. This oversight can result in costly repairs. Using markers or plans can help prevent future issues. Plan the layout carefully. This ensures all connections are accessible. Overall, paying attention to detail in securing and covering your underground conduit will lead to a successful installation.
10 Essential Tips for Installing Underground Conduit Effectively
| Tip Number |
Tip Description |
Best Practices |
Estimated Cost (USD) |
| 1 |
Choose the Right Material |
Use PVC or HDPE for durability. |
$0.50 - $2.00 per foot |
| 2 |
Plan the Route |
Avoid obstacles like trees and large rocks. |
N/A |
| 3 |
Follow Local Codes |
Always comply with local regulations. |
N/A |
| 4 |
Dig the Correct Depth |
At least 18 inches for residential. |
N/A |
| 5 |
Use Proper Joints |
Ensure watertight connections to prevent leaks. |
$1.00 - $3.00 each |
| 6 |
Secure the Conduit |
Use straps or clamps to hold in place. |
$0.20 - $1.00 each |
| 7 |
Consider Expansion |
Allow for thermal expansion and contraction. |
N/A |
| 8 |
Use a Pull String |
Facilitate future wire pulling. |
$0.10 - $0.50 |
| 9 |
Backfill Carefully |
Use smooth soil to avoid damage. |
N/A |
| 10 |
Label the Conduit |
Mark locations for easy identification in the future. |
$5.00 - $10.00 |